Archives

Adventures with the Aerogarden: Herbal Vinegar

If you don’t know what an AeroGarden is, it’s a pretty damn cool little contraption. It’s an indoor hydroponic gardening kit. And I know what you are thinking when you think of hydro. Dirty hippie.

My house is old, and drafty. Although I have a big window on the south side of the house, herbs and indoor plants don’t grow well for me. Except Pothos. Also known as mother in laws tongue. That grows great. But I have that sitting in a pot of water so that’s probably why. And it needs next to no light.

I got totally tired of watching my little plantings die. Something about this house is cursed with plants. Not outside, no, just inside. So the Aero Garden was a little tool I always wanted. Gadget. I know.

When Mr. B came home with one he’d gotten for Christmas, I knew it’d be my responsibility. He’ll eat what I grow in it, but he’s not gonna take care of it either. That’s ok. I’d be more than happy to take over.

I decided to grow herbs first. Herbs because I want to get started making herbal vinegars for Christmas next year. The longer they brew, the stronger they are. They make wonderful everything’s from marinades and additions to salsa to facial and hair rinses.

So I started the little pods up on Christmas day. Herbs are one of those things you need to use as they grow. If you let them get TOO big they’ll die, they go to seed. Pick too much of them and they’ll die. Usually you want to take no more than a third of the plant.

I noticed my Lemon Basil was going to town. I’ll only be able to take a few leaves because the plant is still young, but I can start the vinegar and just keep adding fresh plant matter as I go along. These things don’t take long to replace what you’ve taken.

So, here it is. My little pride Lemon Basil.

She’s getting to be a big girl!

I picked off a few leaves. Mature ones. Remember, never more than 1/3 of the plant. I put these in an 8 oz jelly jar for now. I’ll increase the size of the jar as more leaves are added.

I covered it with some white vinegar. You can use high quality rice and champagne vinegars if you want, but for me, white vinegar is old faithful. It marinades beautifully.

Cap it with a NON METAL cap. That means either using the plastic freeze caps Ball has for their jars OR putting some plastic wrap over the mouth of the jar THEN putting on the 2 piece band and lid. You don’t want vinegar touching metal. Metal+vinegar=corrosion. You don’t want to eat that.

Now, it’s time to label it. You can date it if you want, I don’t, because I’m going to keep adding to it. I found dissolvable labels at Menards for canning jars.  You’ve NO idea how wonderful a thing these are going to be for me. Getting labels off jars is a serious pain in the ass that requires, most of the time, that you boil them off. Urg!

The only issue I’ve got with these is that they are kind of flimsy. They also come in a roll, making writing on them BEFORE you put them on the jar impossible. They are also a weird material, so when I used a sharpie marker on it, it kind of bled. Not very pretty. Next time I’ll use pen.

Lemon basil vinegar is going to make an awesome marinade for fish and chicken. Hmmmm.

Just shake it once a day or every other day, store it somewhere cool, dry and dark, and keep adding as you keep getting more, until about half the jar is full. Keep in mind the basil will kind of wilt as it goes along, so use your best judgement as to how much is in there. You don’t want it so strong it’s going to overpower the food. Once I think I’ve got enough lemon basil vinegar to satisfy gifts and needs, the rest will get dried and crushed and stored as a spice.

So, if you’ve got indoor plants or an aerogarden collecting dust (I’ll BUY IT FROM YA IF YOU DO! I want several of these things!!!), this is a great way to make it work for you. Plus knock out some christmas gifts and tasty meals in the process.

See, I’m NOT anal. There really IS a use for everything!

Making A File Calendar: You NEED One

I used to have this file calendar. I don’t remember WHERE I got it from but it saved my bill paying life.

I hung it in the kitchen. It has files on each month, ones where you can rip out the file at the end of the month to store. As bills or whatnots came in, I slipped them into the folder to be gone through at the end of the week. It made life much, much easier.

When I went to go buy one for this year, there were none to be had. Even online, they were either really expensive or on backorder. Sonofabitch. So, I did what I do: I devised a plan to make my own.

First, let me tell you, this isn’t an all in one 12 month calendar. You’ll have to switch them out at the end of the month, HOWEVER, the file should be going into the filing cabinet anyway, so that’s not a big deal for me.

Here’s what I did:

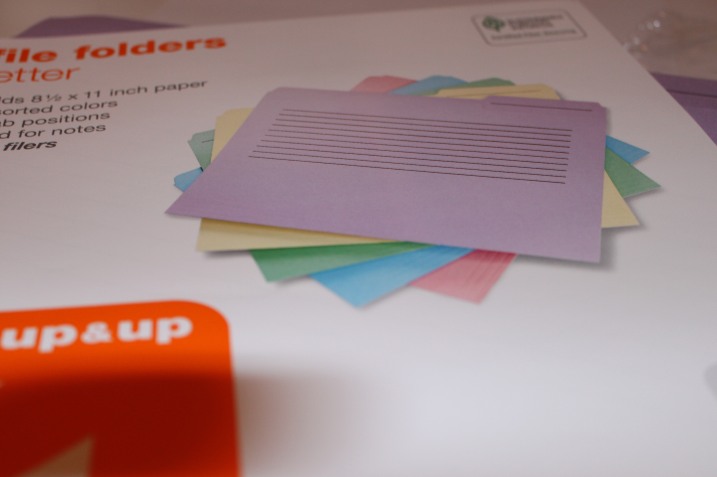
I bought a pack of pretty color file folders. Actually, I sent the Texan out to do this. There were just a couple bucks.

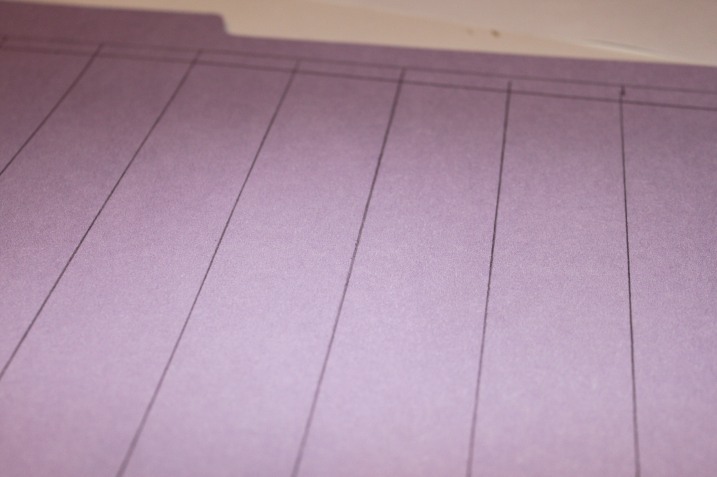
There’s kind of a problem with these. They’ve got lines on the front. Where I planned on putting the actual calendar.

That’s ok. I’ll use the back. Crisis averted.

Now punch a hole in the top back (or in this case the front) where you are going to want to hang it from.

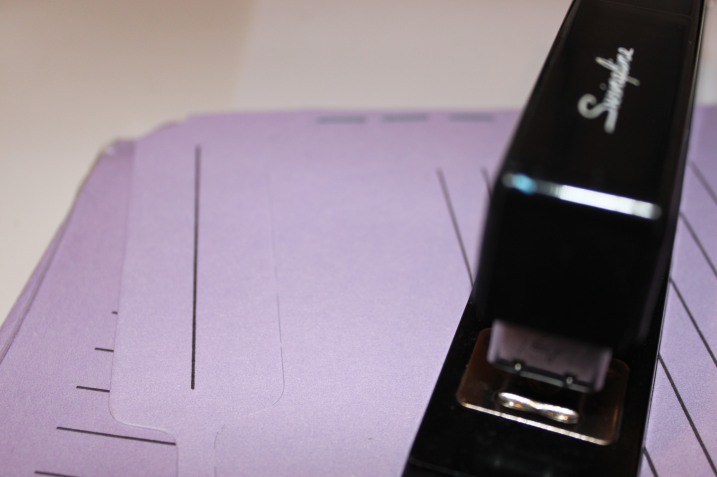
Now, staple the CRAP out of the sides of it. This will make sure the pocket stays closed so you can slip your bills in it.

On the blank side, take a ruler and draw in pencil the calendar. I do it in pencil and then go over it in marker, that way I can erase if I mess up.


Now, that should be the end of it. But it wasn’t.

First, I didn’t liked the way it looked.

Second, doing all that was too much of a pain in the butt to do for all twelve months.

Third, I’d put the staples on the wrong side, the sharp end was facing out. Duh.

Fourth, I realize that little hole I punched was just going to rip from the weight of everything that was going to be in there. So, take two.

This time, I printed out calendars from the internet. Printable2012calendars.com had exactly what I wanted.

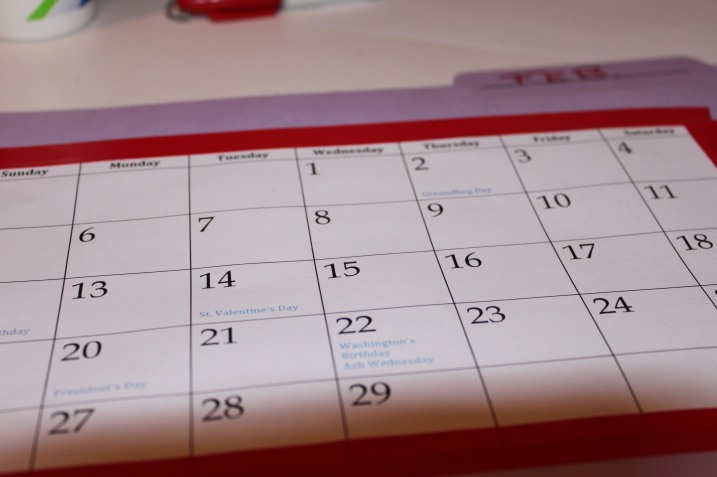
I cut the edges off and the month’s name so it would fit the front of the calendar AND cover up those lines.

I then reinforced where I was going to punch the hole. I did this by putting some electrical tape where the hole would be THEN punching a hole through that. It’s not the most perfect reinforcement, but it works.

Do it to the other side too

NOW punch the hole

Now I could have glued the calendar on. But I didn’t wanna. I saw the pretty colored electrical tape, which I’d bought because they were out of black. Glad they were! I decided to use that to secure my calendar onto the folder.

Staple it up the sides again, label it with the month and you’ve got yourself a file folder calendar.

You can get REAL creative with this, using pretty paper or different tape, stamps, whatever. To me, I wanted to have a little fun but functionality was key. Here are some more I made.

Use whatever you have on hand. I just happened not to have any file folders so I had to buy some, but regular office manilla ones will do fine.

It just makes the mail clutter SO SO much easier for me. Receipts and bills don’t get lost. Yes, I know, I could do online statements, and I do for a lot of them. But I’m absent minded and sometimes they don’t send out those bill reminders via email the way they should, so this ends up SO much easier for me.

Plus, it lets you flex your creative muscles a little bit. See what you’ve got around the house. I almost tried to do this with paper plates. I’ve made mail hangers with paper plates before. But being such as I have no children living in the house, I couldn’t really pass that off as a school art project and make the paper plate wall hangings look appropriate in my otherwise pretty obviously adult centered living room.

Make Your Own Tea Service

Ok, not really. It’s not really a tea service, but you can make your own decorated coffee mugs. Yeah, not the same thing, sorry. Tea service just sounded better.

For some time, I’ve been intrigued by porcelain painting. The fine detail and the craftsmanship is just amazing. But of course I’m not that talented so I have to fake it, and I found a way.

Porcelain paint. Or better yet, porcelain markers. Pens, even. When I first bought them I had first tried Pebeo porcelain paints, which I still use. Though I can’t say it’s not a little frustrating having this awesome design in your head and taking little delicate brush to paint and coming out with something like looks like a 2nd grade craft project. So I figured I needed to step down a bit.

I’ve decorated a few mugs. My practice mugs were always just from the $1.00 store and something to mess around on. I didn’t want to ruin anything too nice. I eventually started going to thrift and antique stores for finer mugs and cups. Now I give them as little personalized gifts. But let me warn you, it’s not as easy as it might seem.

Especially lettering! Unless you are FANTASTIC at free hand, using stencils is a bitch and a half because the pen (or the paint) is thin enough to kind of leak around the edges of the stencil. So you are basically left with smeary letters. That’s when I found the wonder of alcohol with this stuff.

First thing you are gonna have to do is prep the surface of whatever you are decorating with alcohol. It gives it a nice, clean, dry surface and gets rid of any residue that may be on there including dust of any kind.

You’ll need your pens or markers too. Use Pebeo, they are the best. I personally like the very fine tip unless I’m planning on really doing a big project. I also use the actually liquid paints as well with a very fine brush. Don’t buy the glass type pen or paint unless you are planning to work with glass. It’s really transparent and doesn’t work well on solid colored surfaces.

You’ll need some alcohol and a q tip.

You should probably bring your patience as well. You’ll need that.

The endless possibilities of something like this (especially the funny as hell possibilities) is very alluring and seductive. It’s much more work than you think, at least if you are a perfectionist like me it is. And I’m never 100% happy with the results. It’s one of those things that either isn’t as awesome as it seems or that I just suck at. I vote the second one.

Make sure you’ve got a good comfortable position. You don’t want to be adjusting left and right while you are doing this, especially if the paint is wet on one side. I’m very impatient, so I actually stick my hand INSIDE the cup, fisted, to hold it in place. I don’t sit at a table, I learned that lesson. It got real uncomfortable real quick. I actually sit on my bed to do this, it’s much much easier.

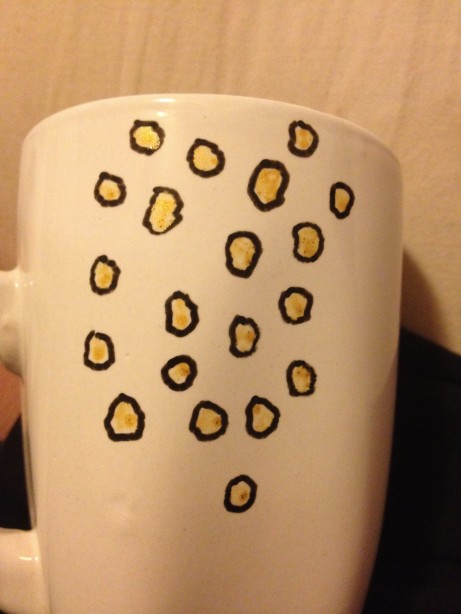
So, this particular cup was leopard printed for a friend of mine’s mom. I started off by painting little circles in black and filling them in with gold paint. The circles didn’t have to be perfectly round because I actually wanted it to look a little distorted and uneven. Or that’s what I tell myself anyway.

Yup. Child’s 3rd grade craft project.

Notice that it does leave that sort of “marker” streak on the cup too. In the dots and around the black. But fear not, usually a second coat takes care of that. And if it doesn’t, adding MORE dots will usually take away that effect.

But mind you, don’t add TOO many coats because the stuff will just peel off. It really takes a very thin coat, multiple if needed, otherwise it just turns to stupid.

Any mess ups you’ve got, use the q tips and the alcohol. It works wonders. I twisted the end of the q tip cotton really tight and pointy so I could get into fine places with it.

Told ya, more made it look better.

So I just kept doing that until I was somewhat happy. Am I PERFECTLY happy with it? No. but I probably will never be. In order for me (and possibly you) to be perfectly happy with it it’d have to be something I did with the finest of brushes and the finest artists hand. Neither of which I have. Therefore, we must do our best. Did I just refer to myself in the third person?

Anyway!

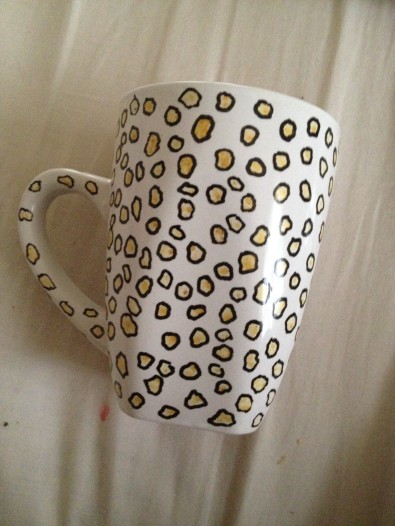
Here’s ultimately how it turned out

It’s not too bad. Still a little mussed in places, but that couldn’t be fixed. OH WELL! ITS THE THOUGHT THAT COUNTS!

That cup was a pain in the butt. I’m not happy with the gold coloring, but they didn’t make brown. The gold has that annoying semi transparent metallic thing going on and I hate that. Stupid paint.

Now you’ve got to bake it in order for it to set. Once it’s baked, it’s hand washable. Just don’t do anything abrasive to it or use scrubbies on it. I don’t put them in the dishwasher because I notice the heat tends to make them go peely.

God my oven is filthy.

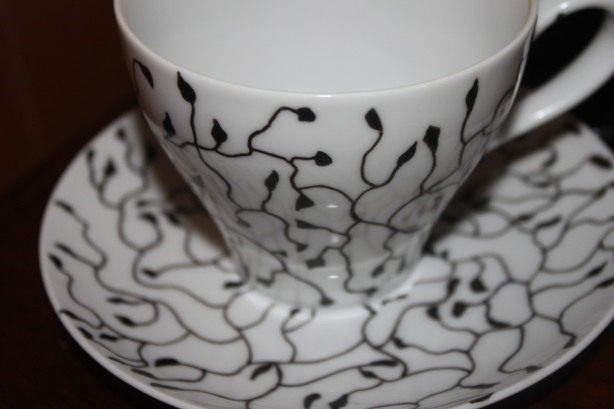
I rather like doing repeating work though. I’d made myself a cup awhile back using only black and a vine type theme, that worked rather well.

See? I’m not all thumbs all the time!

And my personal favorite, and biggest pain in the butt, was making a cup for a buddy of mine. I tried using stenciling. That was terrible, as I said above. I used a LOT of q tips and a LOT of alcohol trying to pull this one off. And it’s still not perfect but you’ve got to know the spirit of the thing.

Letters are hard to get perfect, they are even harder to write straight when you are working on a rounded surface. But the effort was worth it I think. Cause you can’t buy these in stores.

Right about now I can almost see your faces lighting up with the possibilities of what you could put on your own mug.

So I’ll leave you with that, the evil little seed firmly planted there in your head. Get as offensive as you want, you are the master of the mug!

Cheap Ways to Organize Your S*#t

Clutter bothers me. Doesn’t mean I don’t have it, it just bothers me. I’m not completely anal when it comes to organizing or anything. More, it’s that I find when things are NOT organized, I waste SO much time. It’s a time murderer.

I hate digging through drawers to find the measuring cup, which adds 5 minutes to my already pressed schedule. I’d rather know where something is and know I can go get it at any time. It’s a glorious feeling.

I live with men whom, for as much I love them heart and soul, organizing is sort of lost. I find socks in my freezer. I’m not kidding.

I’ve started CLEARLY labeling things. I’ve gone a little apesh*t with the labelmaker you could say. This way there is no excuse. As long as you are able-bodied and you can read, you know where things go.

If you are anything like me, there are places in your house that just piss you off to no end because no matter what you do, they are chaos. I have a couple of those places. You know, the junk drawer or your bedroom closet. One of mine is my linen closet in the bathroom. It drives me insane, no matter what I do, it’s ALWAYS chaos.

I keep the change of bed sheets in there. So every time I go to change the sheets it’s a strange dance of me trying to find the fitted sheets and everything falling out of the closet when I finally grab one (which is inevitably at the bottom of the pile somehow). Then trying to find a pillow case and the same thing happens. It frustrates me. It makes me angry. I’M JUST TRYING TO CHANGE THE SHEETS!

I’ve tried nearly everything: Creative ways to fold them, rolling them, stacking them all nicely. One little blurb I read somewhere said something about tying your sheet sets together with “pretty” ribbon. Really? F*@k that. So that I can watch my beautiful sheet art that I so carefully wrapped end up on the floor of the closet, ribbon a-fray, because someone else wanted to just one pillowcase? NO WAY.

I needed something that would be functional and easy. And cheap. I’d RATHER it look pretty too, just cause I like aesthetics to a point, but it wasn’t a requirement.  I refuse to go to these “organize your home” sites because it’s a bunch of people with way too much money preaching nonsense most of the time, or trying to sell you something. I let it stew in my head for awhile and figured the answer would hit me. I knew baskets wouldn’t work, they were usually too wide for my shelves, not tall enough or not stable enough. Ditto on the plastic bins. And I really didn’t want to run to the damn store and buy more crap to store the crap I already had. I’m not a fan of consumerism.

It did hit me finally. It did.

It’s the holidays, so I have 8 million trillion boxes I got in the mail. You know the ones that you get your mail order stuff in. Brown ones, priority ones, all kinds of ones. I generally put them all in one place until recycle day, then they go to the curb. Or I use them as kindling in the fire. Then I had a little epiphany: I can use those.

They can be used just on their own, but I wanted to decorate mine. For a couple of reasons:

1. I had scrapbook paper I needed to get rid of

2. I needed a reason to take a break from baking cookies

3. I like the idea of my organization being home-made, and nice looking.

So, if you are the kind of person that’s ok with just having boxes there as storage, go for it. But I didn’t want mine to look like used Christmas boxes. Just follow me, you’ll see.

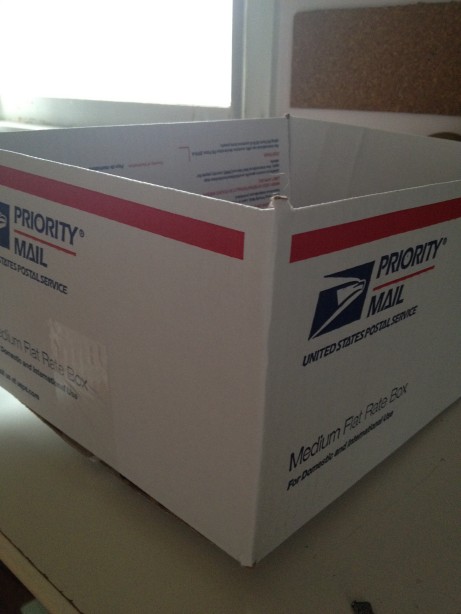
First I took a used mailing box, I do believe I got Mr. Super’s present in this one:

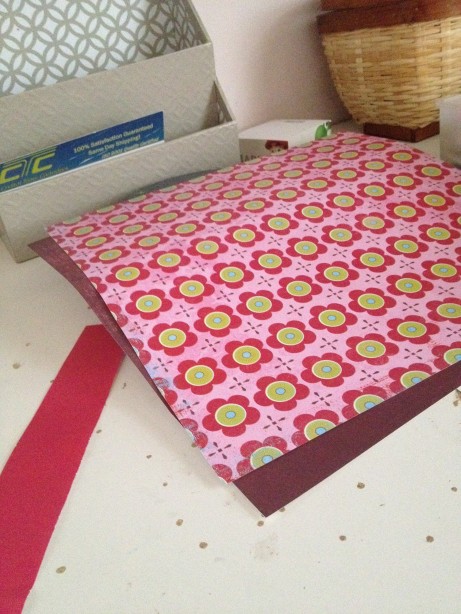
I then had a bunch of scrapbook paper, 12×12 size, that was just sitting in one of my drawers.

And then I cut them into strips and different sizes with a paper cutter, because I totally suck at cutting in a straight line.

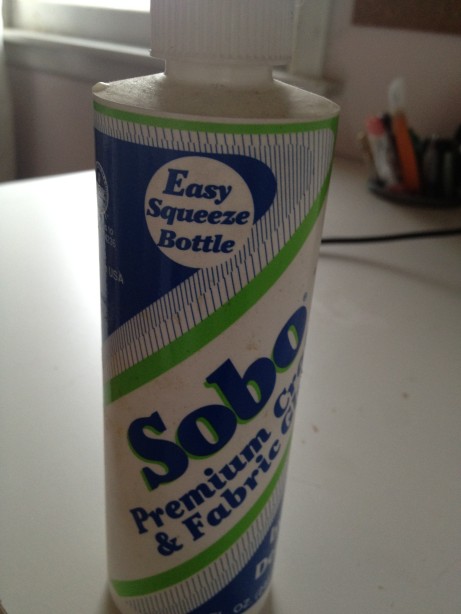
Then I grabbed glue. I like this kind of glue

And I grabbed a strip of paper and put glue all over the back of it. I started with the corners of the box, because I figured those would be the biggest pain in the ass. They were.

The good thing about this glue was that it dried clear. I didn’t have a whole lot of time to be neat about it. I just kept putting strips of paper on the corners and worked my way in.

To fill up the sides of the boxes I used scraps, or cut the long strips in half. It really didn’t take long at all, maybe 5-10 minutes per box.

I then decided how many boxes I would need, and what they would be for. So I cut a little strip of paper, turned it over to the white side, wrote the name of what was to be in the box on it in black marker and glue that to the front. So it turned out something like this:

And about an hour later, I had boxes for all the stuff in my closet

That’s so much better! Much more organized, though by no means perfect. And totally free.

Except…do you see that on the top shelf? Do you see that? Next to the humidifier? The black and silver thing. You know what that is, dear readers? DO YOU KNOW!?

IT’S A COMPUTER MOUSE! AND ITS NOT MINE! Why the HELL is a computer mouse in the bathroom closet? Your guess is as good as mine. And THAT is part of the reason why I did this. Not that pretty labeled boxes are going to stop somebody from putting some DUMB shit where it doesn’t belong, but one can always hope!

Man, The Sh#* You Can Do With Orange Peels

I’m continuously amazed at some of the uses that I find for things. You see, I’m completely hell bent on having a homestead one day. Being a born and raised inner city girl who’s now in the suburbs, the idea never really sunk in that once we move there won’t be a grocery store within walking distance. Or I hope there won’t be.

I read and researched and flipping through homestead magazines and realized that these people all pretty much had the same thing in common: They used what they had. They didn’t make shopping trips every other day. Over the course of a few years, that’s what I’ve started to do as well. Call in in-house training. I’ve also come to realize that living on a homestead you have to second guess what you throw out.

Don’t get me wrong, I’m not going to save every scrap of paper, etc. The key to this is really to use less and hence waste less, not hoard garbage. But I’ve found some interesting uses for things.

First is my compost. Anything that can’t be turned into something else food wise gets composted. I have a massive twirly composter. It works great and I love it. So most kitchen scrap never really goes to waste. But tossing it in the compost isn’t the only way to go.

Mr. Super, my resident truck driver. used to work for a small trucking company that did odd loads from here to…anywhere really. One year right before Christmas he had a load in Florida delivering all kinds of citrus fruits. The owner of the company he was delivering to rejected a bunch of cases of fruit because they were blemished and the guy offered to let Mr. Super have it. I mean loads of it. Think about 100 pounds of fruit or better. Case after case. He ended up bringing it home with him. Being a country farm boy himself, he hated to see that stuff turned into the trash and he knew I could do something with it. Most of it was oranges, but in there were limes, lemons, grapefruits and tangerines.

So here I was, nearing Christmas, with a ton of citrus fruit scattered across my kitchen. Ok, first things first. Check to see if the insides were good and bingo, most of them were just fine. So I started canning them up. Orange slices and grapefruit slices, orange juice, lemon juice and on and on.

Course, then you are left with all the peels. Pounds upon pounds upon pounds of peels. Instead of crying my eyes out, I found some uses for them. I dried up most of them and used them like crazy.

To this day, I still dry the peel of an orange or citrus fruit when I use it because they are so versatile. They never go in the compost here. I highly doubt you’ll ever 50 pounds of oranges sitting on your counter, but it doesn’t mean you don’t eat an orange every once and again and drying the peels is really as easy as leaving them on the counter for a week or so. You don’t need a dehydrator, those that does make quick, even work of it.

You can slice the peel into thin strips or just leave it in chunks. It really doesn’t matter if you aren’t going to be eating them or using them decoatively, they’ll dry the same. If they aren’t for food use, you can leave the pith on too, makes no difference.

Here are some of the things I’ve done with DRIED citrus peels:

Put them on the stove in a pot of water in the winter time and simmer. Puts moisture back in the house and makes the house smell lovely. When they are spent, compost them or put them in the garbage disposal. They’ll freshen it up.

Make a potpourri with citrus peels, cinnamon sticks and a little cinnamon powder. Put it in a dish or a bag as a cute gift.

Grind them up with a coffee grinder. Grind it REALLY fine. You can then use it as a facial scrub once you add some jojoba, apricot kernel or very virgin olive oil to it. You can use the powder plain I suppose but it might be a little rough. You can also use the powder to scour counters, tubs or sinks. Ditto on making it super fine so it goes down the drain ok.

Put the peels in a jar next to your fire place, they make great kindling and smells wonderful!

Place a few in a bottle of vinegar and let it soak for a couple weeks. Replace it if needed. It’ll make a wonderful orange vinegar you can use for cleaning. Or add 3 tablespoons of the vinegar in a glass pint jar filled with water and use as a final hair rinse in the shower. No, you don’t have to rinse after using it. No, you won’t smell like vinegar once your hair dries. Works wonders for shine and removing build up.

Mix it in some baking soda as a carpet powder. Smells great when the vac hits it, again, make it super fine and soft though or it’ll clog.

Once powdered, you can also stick in a muslin bag with some cinnamon and nutmeg and make a spicy tea.

Zest the citrus fruit, removing all the pith, and dry them. You can store them in the cabinet in a jar this way.

You can make citrus sugar. Zest the fruit, like above, dry it and powder the ever living hell out of it, and mix some in a jar of sugar. It’ll flavor the sugar.

Some things you can do with FRESH peels:

I’ve only ever done this orange peels but I don’t see why it wouldn’t work with most citrus peel: Cut fresh peels into thin strips. Blanch them (dip them in hot boiling water , then cold water again). Make a super thick syrup of sugar and water. Think 1 cup sugar to 1/2 cup of water. Stir this on the stove over low until totally dissolved. Add the peels and simmer 3-5 minutes. Pour the whole thing, warm syrup and peels, into a bowl with a lid. Place the lid on and stick them in the fridge overnight. The next day, drain the peels or use a slotted spoon, and roll the peels in more white sugar to coat. You can use them in recipes, but I’ve eaten them just like that and people love them. Mind you you can’t eat many straight like that but you can freeze them. Try dipping them in dark chocolate too after you’ve covered them in sugar. So Good! (Diabetic coma time!)

Zest the peels and freeze them for use in recipes. This skips the drying step and you can just wrap them in a bit of foil and store them in the freezer nearly indefinately.

You flavor sugar using fresh peels too. Just stick a fresh peel in a jar of sugar. The sugar should dry the peel out and leave you with flavored sugar.

Use the fresh peels to flavor teas! Lemon is great for this one.

Make vinegars, just like above.

Make a flavored liquor. Pour vodka over some fresh citrus peels to infuse it with flavor. It won’t be sweet, but it’ll be seriously citrus flavored.

Put them down your disposal, it’ll fresh it up!

Rub the peels on your counters, lemon works great for this, it’ll clean them and give them a beautiful scent.

You can put some zest in a food processor with some sugar and olive oil for an awesome body scrub.

Stick a piece of peel, lemon works best for this too, in some brown sugar to keep it soft!

Ok seriously, I could keep going. And going. And going. But by this point you are either snoozing OR itching to go run to the grocery store and buy a bag of oranges. (HEY! Now’s the time! They are on sale this time of year!) But these little buggers are really versatile. So consider me the devil on your shoulder and go do it!

Another Gamer Gift…that I want to keep for myself

My mother was huge into plastic canvas. I inherited her trait for having to learn the hell out of something. I don’t just learn something, I want to learn everything about it (selectively of course)! She was the same way with certain things, crafts namely.

I always remember her cross stitching, crocheting, sometimes sewing, macrame. When I was maybe in 3rd grade, she started plastic canvas. And boy did she roll with it.

She started off with things like magnets or tissue boxes. In no time at all, the woman was making Barbie furniture and her biggest project? An entire barbie FURNISHED house. Yes, it was a barbie doll HOUSE. HOUSE. It was like 4 feet tall and just as wide. Needless to say, between crocheting and plastic canvas, she’d made me tons of Barbie stuff. I was a happy child.

I still have a couple pieces of her handy work. One of my favorites is her Christmas village. Some of the pieces went missing, but this one is a gingerbread house tissue box. Check this thing out:

The top comes off to store a tissue box. The doors and shutters open and close.

Look at the freakin’ detail of this thing!

When I was about 12, she taught me and my BFF (Pookis) to do some simple projects. I didn’t really keep up on it, but I still remember the basics. It’s not hard, the simple stuff isn’t anyway. Any pamphlet can teach you. I’m not going to because it doesn’t translate well to text. But it really is SUPER easy. Like kid easy.  It’s a lot like cross stitching, but the patterns are bigger, so is the canvas, so it’s a little easier I think. Until you get to the insane projects like above. No way I could do that. No way. I can’t even make a tissue box. So I’ll stick to magnets. I will NOT be learning the hell out of plastic canvas.

Which is what brings me to my next point. Gamer gifts. A previous post of mine already discussed how much of a pain in the ass it is to get hard core gamers gifts. I’m a gamer myself. I freakin’ LOVE my Xbox. But hardcore? Probably not, no. I have too many hobbies to be hardcore anything, really.

Now, you probably won’t find a Left For Dead 2 plastic canvas pattern anywhere on this planet. But, have no fear! There’s a program for that!

Snag a picture or logo of whichever game you wanna stitch up. I did Gears of War. (YEEEEEEEAHHHHHHHHHHHHHHHHHHHHHHHH! Sorry…got excited)

Do a google search for “plastic canvas pattern software”. You’ll come up with a bunch of stuff. Also, type “free” in there somewhere. That way you don’t have to pay for it. These programs are pretty damn easy to use. Pretty self-explanatory.

Once you’ve got your pattern, you’ll need the following things:

Yarn, in appropriate colors. Regular worsted acrylic cheapy yarn is fine. You don’t need freakin’ special yarn.

A sheet of plastic canvas

A strip of magnets, you can get this at a craft store

Felt in a matching color

Scissors

A plastic canvas needle

Glue gun

Now it’s time to cut out your pattern. This is easy enough, just follow the little squares on the plastic canvas pattern. It’s a lot of counting. And it’s really annoying. And make sure you cut on the OUTSIDE of the little squares not the inside, or you’ll have jagged edges and will have screwed up your pattern. Ask me how I know.

After swearing up a storm trying to cut out this damn pattern (mine was a little complicated to cut) I used a sharpee to outline the pattern on the canvas before I cut. I messed it up anyway, but it created the illusion that it was easier. And THAT’S what matters.

So cut out your DAMN pattern and try not to throw it across the room.

Now thread your needle. Sounds easy. Should be easy. Pain in the ass. I hate threading needles of any kind. I don’t care if I could fit my freaking hand through the eye of it, I’d find someway to mess it up. Anyway, yeah, now that that’s done.When you start doing your stitches, just hold the tail of the yarn in the back for a few stitches, so you are wrapping your work around the tail. That’ll secure it with no knot. Don’t knot it. If you knot it it’ll be lumpy in the back. Ditto when you are done with that piece of yarn. Tuck it behind the stitches and cut it. Don’t knot it. Did I say that enough times?

Start working your pattern. Plastic canvas patterns are color coded and generally the easy ones have you working in only one direction. So like you’ll be making only right to left stitches so it keeps it nice and simple. Do this where it’s quiet cause you’ll have to count. A lot. And it gets confusing when you lose count. Then you get frustrated, like me. And you f*(k up your pattern and start again like 23 times before you decide that you’ll just have to work around the fact that you cut the damn thing wrong.

Martha Stewart doesn’t tell you this shit. But you know it happens to her.

Jumping TOTALLY ahead to when you are finished with the damn thing. Yeah I know, that’s jumping ahead.

I was so pissed at this by the time I was done, and I have plastic canvas-ing in my blood. But as a knitter, as a baker, as a soap maker, I don’t think I’ve got the patience for this shit. Maybe I’ll try it again after the holidays. It was totally gratifying, just like I remember, because the work is quick, but still. I think maybe I was just pissy.

So this is what it looked like

Stupid plastic canvas.

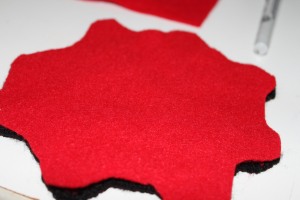
Ok, now you are going to trace the piece onto some felt with a sharpee. This is the easiest way to make sure you get the back even. Plus, you can always cheat and carefully trim excess once it’s glued on it needed.

Stupid felt

Now go ahead and glue the damn thing on. This part sucks because it requires a glue gun. I hate glue guns. The glue dries so freaking fast and the glue stick falls out and I just hate everything today ok? GOD!

Stupid glue gun

Make sure to glue a little at a time, I usually glue in a straight line across. That way the edges are glued right and the middle is glued nicely and it doesn’t dry on you like it does if you try to glue it all at once.

Stupid glue.

Stupid lining it up to glue it.

It would be wonderful if you were done with the evil glue gun now but you aren’t. No sir. Now you’ve gotta glue the stupid magnets on. Well, that is, if you want to make a magnet. I suppose you could make an ornament too. Just glue a loop of yarn under the felt. Or you could make coasters. Then you would have make four though. Good luck with that. I’m doing a magnet, screw that.

So glue your magnet strips on the back

Stupid magnets.

Now, before giving your gift to your gamer, make sure you take all the little glue strings that inevitably got stuck to the felt and the yarn because the stupid glue gun doesn’t get glue hot enough for it not to dry on CONTACT and leave STRINGS of GLUE everywhere!

*Deep breath*

Actually. Come to think of it. I kind of like this magnet. I’m a huge Gears of War fan. Maybe I’ll keep it for myself…

That’ll teach my gamer buddies to make me make them annoying gamer gifts for Christmas. They didn’t actually ask me, they actually had no idea I was doing this but too bad. It’s too good a justification to pass up…

My Gingerbread House Was Foreclosed On

Let me be clear. I HATE gingerbread houses. No. I hate making gingerbread houses. They are the most difficult thing on the face of this planet. And I can’t believe people actually force their children to do this for “fun”.

About 5 years ago I made my first gingerbread house. It wasn’t actually a house, it was a sleigh. Filled with holly jolly, The Texan and I had gone to Target and thought HEY! A gingerbread house (sleigh), that sounds like fun.

Famous last words.

After about two freaking hours of trying to get this thing to stay together, we finally did it. We decorated it very minimally. We walked away because, well, it was like some kind of weird torture putting this thing together. But unfinished projects drive me nuts so, not unlike a slave driver, I made the Texan sit there with me and help me until it was finished.

Half falling apart and all twisted and screwed, we left it on the table. Only to come back into the room to find that my dear beloved dog (rest his soul) had taken it off the table and was happily munching on it. That was it. I was done. I swore them off forever.

Just on a random *#&$*@) note, the dog NEVER, and I mean NEVER took ANYTHING off the table. In the 17 years we had him, he never ever took anything off the table. You could put a steak in front of the dog and say no and go grocery shopping and he would leave that steak alone. But no. He ate the gingerbread sleigh. He knew. He must have known that it was evil. He ate it to rid the world of it. He was protecting the pack.

This has become a running joke (if we don’t laugh we will cry) with the Texan and I. Mr. B has been poking fun at me for weeks telling me we should get a gingerbread house kit. He never put one together before I think. So I showed him up. I bought one. And I told him he had to put it together.

Somehow the agreement was made that HE would put it together and I would decorate it. I think he was trying to take pity on me or something, murmuring something about how the decorating was the fun part. Fun my ass.

But I agreed. First because I wasn’t going to let the gingerbread demon defeat me and also because it was worth the pain to see what was an inevitable bout of serious Christmas frustration about to fall so righteously upon Mr. B’s head. Smug I was. Smug I shall remain.

It must be said there was a bit of cheating on his part going on. First off, the damn thing had a stand. It had grooves that you filled with frosting so that the walls of the house would stay. No such thing is available when it comes to putting the roof on. Vengeance is mine.

I watched intently as he happily unpacked the pieces, filled with holly jolly and thinking he was going to show me up. I waited, saying nothing, poised with my camera.

So Care Free...Little Does He Know...

And he started to happy fill the grooves with frosting to keep the walls of his beloved, and seemingly innocent, gingerbread house stable

Yes, that's right, smile before entering your demise. That's how they get you.

Not to get out of chronological order here, but the smile was creepy…because he normally looks like this most of the time

Mr B in his natural state, right before the evil gingerbread house filled his head with false joy

At about this point Mr. B was getting rather smug. “How easy this is!” he exclaimed, filled the pre made grooves with frosting and happily watching his gingerbread walls stand up just fine. And also at about this point, the Texan walked in (he’s the headless one in the Texan shirt) smirking. That’s right, he knew what was coming.
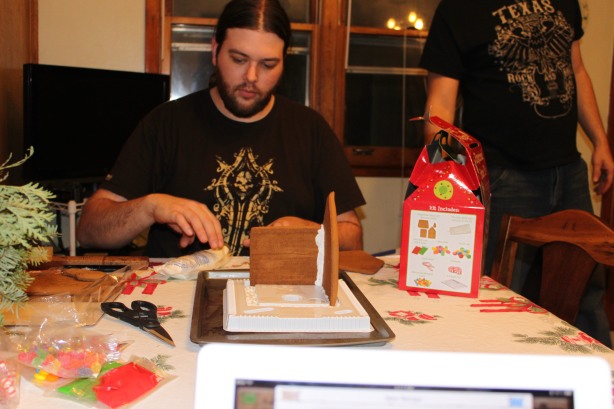
The Texan shaking his non-existent head at poor poor Mr B and his delusions that this house was going to be easy to make

And away Mr. B went. Plugging away with his frosting. He got one wall up. Then two. Then three.

Then, frosting canal or not, they started to fall down.

He picked them back up. Then fell again. He kept a smile on his face. But they fell again. And one more time.

Finally he got them up. All four of them. He was murmuring at this point and I was nice enough NOT to take pictures of his misfortune (I’ve been there, I know…).

There was a little bit of swearing because there were smudges of frosting on the walls of the house from having to pick them up with sticky covered fingers when they kept falling.

Then came the roof. He slathered it with frosting and pressed it on. It fell.

It slid.

It wouldn’t stay.

NOW came the real swearing! NOW came the bargaining “If it would just stay…” he was growling…

Among some of the phrases I heard, and some I won’t repeat I think I heard “They didn’t make this right” and “how are you supposed to” the most. I didn’t take pictures. Well, I didn’t take too many pictures. I took this one though. This was his 987th attempt at the roof
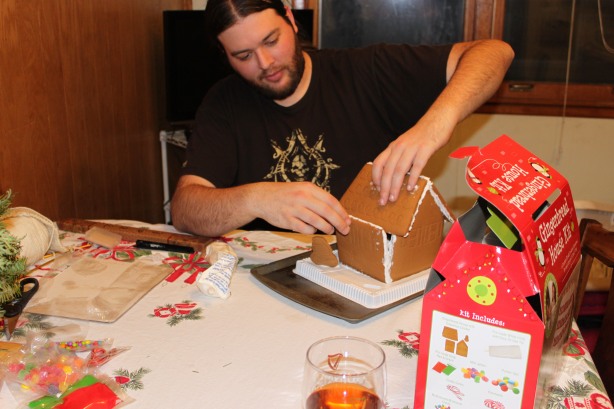
The contempt for the gingerbread house has blossomed

Most of you may think that look on his face, the one that is somewhere between a forced contented smile and severe constipation is actually a look of a patience filled man with the Christmas Spirit. It is not. He was pretty pissed at this point and highly aware of the camera.

This dragged on about another hour. I was snickering while he was swearing, shaking my head in the “I told you so” fashion. He didn’t think it was funny. I couldn’t help it. I’m a bad person.

That damn frosting dries pretty fast into a brittle, nasty, flaky mess. Good I suppose to keep it together. Bad because you have to work fast because it dries so quick and you end up putting more and more and more frosting on until you are either out of frosting or the house is held together with 4 foot thick frosting on either side.

He murmured something about using caulk and how it would taste better than the frosting. I laughed, told him no that’s cheating, and continued to watch.

Finally, he had it up. And by up I mean smears all over the roof with frosting and very precariously balanced roof sides that were dangerously close to looking as if the owner of this gingerbread house was getting a letter of condemnation from their township. But! It was up! And it wasn’t bad, really, for a freakin gingerbread house.

One last check to make sure it wasn’t going to blow over…

House inspection. You'll notice the happy people on the box look nothing like Mr. B

He promptly gets up from the table, announces he’s done, and that I have to decorate it. Actually what he said was:

“I’m done with that f*&#ing thing.”

Well stated.

He tried to convince me that it only took a half an hour for the frosting to dry. That’s what it said on the box. I told him no way, no how, no chance am I even touching that thing until the next morning. I’m not going to go decorating that thing unless it’s been sitting at least that long without falling apart. I had hope that I would wake up and the thing would be all fallen apart so I wouldn’t have to decorate it. No such luck. All night I worried about it, like the next morning I would be in front of the firing squad. Would it fall? Would there be enough frosting? Gingerbread houses and the people that invented them are evil. Evil evil. They hate us all.

Fast forward to the next morning. My Pookis drops by to pick up some perfume I made her (see how much I love her) and I, after about half an hour of stalling, tell her about the gingerbread house. She offers to take pictures while I do it. Okie doke. Oh boy.

So I start putting the frosting on the roof of the house.
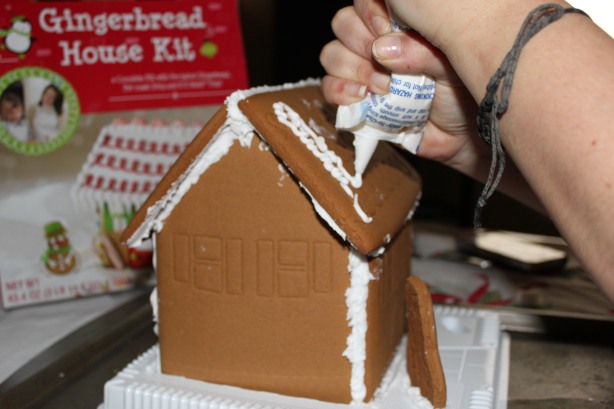
The Hell Begins

Mind you, Pookis isn’t really there to just take pictures. She likes to yell orders too. She is very bossy and even more impatient. Keep in mind she doesn’t actually HAVE the patience to do things like this, but she sure does like to tell YOU how to do them. We’ve been told we should have a cooking/crafting show together where I make everything and she yells orders at me while I’m doing it.

This is all in good fun, you realize. I don’t mean to suggest she doesn’t bark and get pissy, cause she really does, but she also knows she does it, and laughs about it.  And when you look at her and say “YOU DO IT” she’ll tell you no, that she can’t do it. At least she’s honest! And hilarious! Mix her yelling orders at me and me giving her snide remarks about shutting her talk hole and apparently people find this interaction pretty funny.

As I’m putting the frosting on she’s yelling at me to TWIST the frosting bag don’t SQUEEZE it. And twist it from the BIG end not the little one. This ends up with her grabbing the bag out of my hand and twisting it for me and handing it back. Hey! Less work for me!

Now it’s time to spread the frosting. I used a spreading knife. Seems logical.
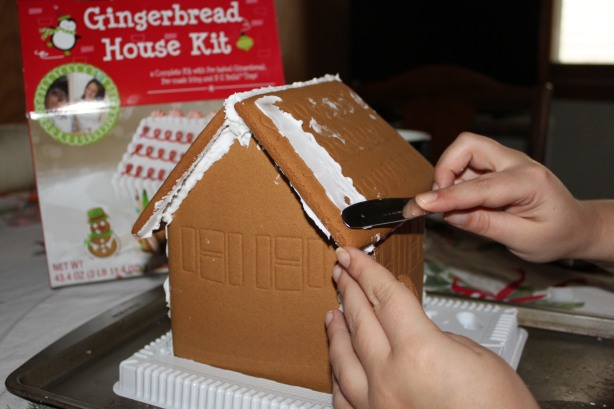
Spreading the evil frosting

At about this point I notice that the frosting is leaving lines as I’m spreading it. I’m actually not bad with frosting, but this isn’t frosting, it’s pure white flaky sugary evil.

Pookis is barking at me that I need to use a spatula. Then it wouldn’t leave such big lines. Use a spatula. SPATULA.

OK! I go get a spatula.

Yeah, bigger lines indeed. Not to mention the spatula is really flexible so it kind of just drags the top of layer of frosting off with it when you are trying to spread it around. And the frosting is now drying and flaking off.

Pookis is barking “It’s DRYING! It’s DRYING! Stop putting more on? Why are you putting more on? It’s drying and flaking. It’s gonna look like crap…why are you putting so much on?”

I’m arguing that the butter knife was better. She’s arguing that it leaves too many lines. All the while the evil frosting is laughing at us and drying into an evermore hard and brittle tool of Satan. (Well, that’s what it felt like anyway).

We compromise. I’ll use the STUPID butter knife to spread the STUPID frosting onto the STUPID roof and then I’ll use the STUPID spatula to smooth the STUPID frosting out. Sonofabitch!

I do the roof and just decide screw it, screw it, SCREW it, the lines are staying and it’ll have to look like snow drifts. Pookis nods and agrees. There was simply a very windy blizzard that hit the house’s neighborhood. That’s all.
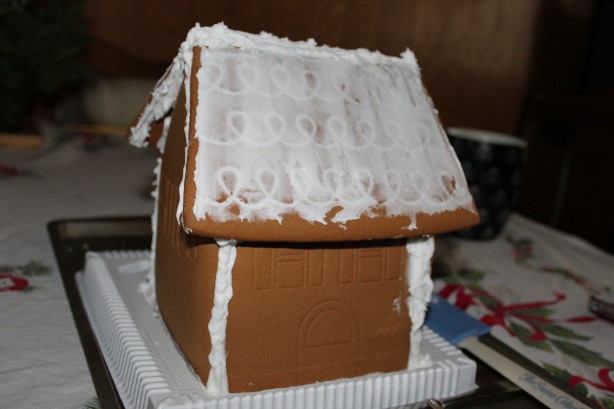
Stupid Blizzards.

Now I’ve got to do the top of the roof. *&@!

The picture shows big dollops on the top of the roof. Sort of like you see on the rim of a cake. Ok, I can do that. So I start doing that. Enter Pookis

“Squeeze out a bunch of frosting and keep the nozzle in the middle and then lift up and it’ll make a dollop.”

She says this AS I’m doing it. Duh.

“You’re not making them big enough, look at the picture, they are bigger. They aren’t big enough.”

FOR *@&’S SAKE!

“You know the candies are supposed to go on top. The peppermint ones. You have to have more frosting or they aren’t going to stay”

I give in, I GLOB frosting on top in hopes of keeping the stupid star mints on the roof. I did ask why it HAD to be like the picture about a million times. BUT NO! NO ONE LISTENS TO ME!

BIG ENOUGH GLOBS FOR YA?

The frustration is rising in me at this point. I want to run it over. I want to chuck it at my yuppie neighbor whom I can’t stand. I want to light it aflame. But I don’t.

“Take a deep breath” my Pookis says. Yes, deep breath indeed. Thank you. Of course three seconds later it’s

“You better put those mints on, the frosting is gonna dry and they aren’t going to stay and then…”

ALRIGHT ALREADY!

So I stick the mints on.

WHY DO THE MINTS HAVE TO GO ON TOP OF THE HOUSE ANYWAY!

I get the rest of the mints on. Then one starts falling backward.

“It’s FALLING! It’s going crooked. It’s gonna fall!” Yeah I see that.

I fix it. It falls again. Again. One more time.

“Put more frosting behind it. No behind it. Put a big glob there. No! BEHIND IT!”

Jesus Mary and Joseph.

Right. Now that all the mints are on I hear

“Jess. One of the mints is backwards. It doesn’t have the stripe on it. There’s no stripe. And that’s facing the front of the house. There’s no stripe. It’s gonna look funny. All the other ones have the stripes facing the same direction”

*sigh* At this point, I don’t care if there’s a freaking DOG TURD adorning the front of this abomination of nature. But I refuse to let it defeat me. I turn the house around.  I soon realize that it’s a just a lone mint problem. That mint doesn’t have stripes printed on both sides. The rest do. That one is the lone mint ruining the top of the gingerbread house. I try to pull it off to turn it around. No dice. Frosting dried.

“It’s gonna flake off. Don’t pull it. It’s gonna fall off. Are you gonna pull it? It’s gonna look funny.”

A single blank mint. DEAR GOD! ALL IS RUINED! ABANDON SHIP!

I should have abandoned ship. I should have sat on the gingerbread house after I ate a huge bowl of double bean chili topped with Habanero relish and a couple of Budweiser’s. I didn’t. I refused to be defeated. I handled with great care, actually, this mint crisis. I turned lovingly to my Pookis and said, with some *ahem* passion:

“IT’LL BE F&*@ING FINE!”

She took a picture just to rub it in

But it's fine from the other side. As fine as it can be anyway

Now came time to decorate the roof. Great. They give you this teeny tiny bag of frosting with little “v’s” imprinted on it. I guess that was where you were supposed to cut it so you could pipe it out. I don’t know. We argued about that for a couple of minutes before we decided just to cut one of the ends off.

“Just snip a little off! Just a little! Just a TINY little corner. Less than you think!”

Right. Cause I’ve never used a piping bag before.

I do realize there are grooves for you to follow on this stupid ass house, but they do no good. The frosting is a weird consistency and it’s not as easy as it looks. A Wilton Cake specialist I am not.

WHO THE HELL DECORATES THEIR ROOF ANYWAY?!?

“They’re messy. You are putting too much on. The loops are too big. Follow the grooves!”

So I turn to my dear Pookis and I say “YOU DO IT THEN!”

She snatches her hands away and puts them very close to her chest as if she’s afraid the frosting bag will magnetically adhere to her hands if they are exposed.

“No!” she says

“AND WHY WOULD THAT BE?” I ask

“Because I can’t do any better.” she says

At this point Mr. B is standing over us laughing hysterically telling us we need our own cooking show. I just about throw the bag at her and get up from the chair. I fold my arms and nod my head. She’s doing it. Whether she likes it or not.
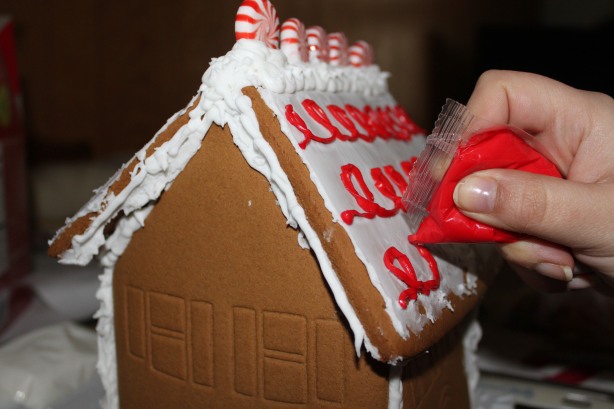
Not so bossy when the frosting bag is in YOUR hand are ya, Pookis?

It doesn’t take but a loop and a half before she’s frustrated. I told you she doesn’t have much patience. But we are all giggling at this point. Probably because if we don’t we’ll cry.

The sum of me and Pookis's work on one side of the roof. TRY IT BEFORE YOU JUDGE!

Mr. B is still laughing at us at this point. So we tagged team him and put the frosting bag in HIS hand this time.

Mr B's loop attempt. Butthead.

Of course his is much better. We both agree he’s a butthead and are thankful that he has to leave for work because we are embarrassed now.

Now onto the doors and windows. For the love of God. They are TINY! And the detail is just ridiculous. You can’t possible get detail like that with piping bags. I almost busted out the toothpicks until I remembered that I hate this thing and I wished it dead and just wanted it over with. Pookis at this point is checking her phone

“Are you gonna decorate the whole thing? This is going to take forever!” and continued to check her email and Facebook.

I did the stupid door
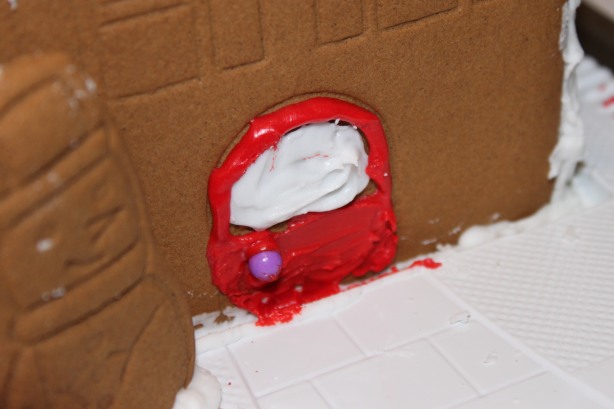
Elizabeth Arden?

“IT LOOKS LIKE CRAP! THIS IS IMPOSSIBLE” I shout

“It’s cause you are putting too much on.” she doesn’t even look up at from her Iphone as she says this. I murmur under my breath about then maybe SHE should do it.

Then I do the stupid windows

Really? Shutters on a gingerbread house? COME ON!

I try to stick on a couple of candy canes at the front of the house. But Frosty, who is being a lazy ass just standing there in the yard, is in the way. So I only end up putting one candy cane on by the front door.

“You can just go around the other side of him” she says

No. Cause I’ll knock him over or break him or something. So I put the other candy cane on the back door. Pookis does not approve. Too bad! There are no rules in HELL!

I then try to decorate Frosty the FREAKIN Snowman. He’s SO tiny. The piping bags aren’t small enough. And he needs to be white and the piping bag with the nozzle on it is WAY too big.

“Just cut the bag open. Take the nozzle off and…”

No. Stop right there, I tell her. That’s too much work for just Frosty. I start making his eyes and mouth. She’s laughing at me because globs of frosting and coming out from his eyeballs and mouth.

“WIPE OFF THE NOZZLE” she demands. I do that. It didn’t help. I try to trace his arms out. That didn’t work too well.

“MAKE SURE YOU PUT THE RED STRIPE IN HIS HAT”

*SIGH*

Then the buttons proved a challenge. The things they give you for buttons are too big. Pookis is convinced they break the candy. So she goes up to the counter and starts trying to break the candies. It doesn’t work. They are apparently made of diamond. I overrule her and stick GLOBS of frosting on frosting and stick 2 candies instead of 3 on him with frosting. Too bad. Frosty will take the buttons I give him and like it.

The picture on the box (just for reference, I’d like to burn at the stake whoever put a picture of what it’s “supposed” to look like on the box. So that kids and Pookis’s worldwide can bother their parents/BFF’s about how the thing is SUPPOSED to look) has icicles falling from the roof. You read that right. Frosting icicles . Pookis won’t let me get away with just putting on some regular old globs. It has to be icicles .

So, on the first side I made long, thin drips of frosting to emulate this.

This is not easy. The frosting wants to touch the house. It wants to break off. It wants to not dry mid air.

“That looks horrible. They are much bigger on the picture. Make them thicker. THICKER!”
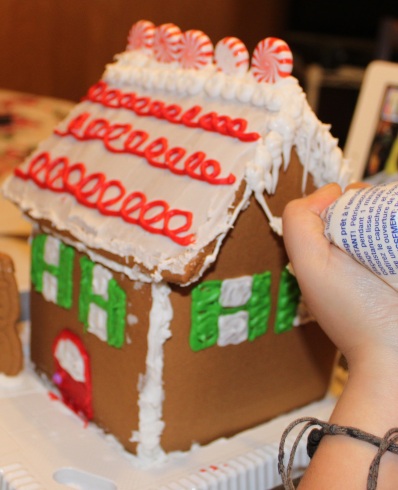
WHY AM I DOING THIS TO MYSELF?


I AM MAKING THEM THICKER! Or I’m trying anyway. I make them as thick as humanly possibly. I follow the roof line all the way around and put icicles all over them. It’ll have to do.

I fill the pathway in front with frosting and stick some spice drops and Spree candies in the walkway, cause that’s what the picture has. I don’t have enough green frosting left to stick candies to the frame of the house so I used spice drops and white frosting and stuck them on. I then got up from the table and handed Pookis a bag of little candies and told her she’s responsible for putting Christmas Lights on top of the house. So she globbed away sticking little different colored candies all over the roof. I was too tired and traumatized at this point to bark orders at her in retaliation. I did dishes. Dishes are super cathartic compared to this. And I hate dishes.

Finally it was done. We both looked like we’d been through war. Hair mussed, out of breath, faces red. We stood looking at it as if it was some type of horrible reptile or predator we had just killed after fighting with it for an hour.

Yeah, I know. You can see the blank mint on top. Shut up.

We had a cup of coffee. We could have used a shot of Southern Comfort.And a crack pipe chaser.

What I want to know: HOW THE HELL DID PEOPLE DO THIS BEFORE THEY HAD KITS? SERIOUSLY? BAKE IT YOURSELF AND USE HOME MADE NON CAULK FROSTING!?!?! F*&K THAT!

But now as I sit here typing, this horrible evil spawn of Satan sitting calmly in my field of vision, taunting me with it’s gingerbread taintedness and staring at me with it’s globby frosted hatred, I am calm. I am serene. I have a plan.

At midnight on Dec. 26, 2011, technically AFTER Christmas is over, I will take my little evil gingerbread house. I will take it and place it in a huge bowl.

I will dissolve in 2 bottles of Jack Daniels and drink it to absorb it’s power.

While the Ginger Jack infusion is dribbling down my Christmas sweater I will light the box on fire, igniting first the happy people on the back picture who look like they are having SO. MUCH.FUN and laugh maniacally before burying the ashes in the my yard.

THAT is what I’m gonna do.

This is the world’s perfect gift for an enemy. Buy one for your boss and one for each of his/her children as well. For that PTA mom who gives you shit about not showing up to every meeting. To that asshole UPS driver who throws your packages from across the lawn. Do it. You know you want to.

But if you want to go out and get a gingerbread kit to torture yourself and your children with, go right ahead. When it’s all finished and you and the kiddies are huddled in the corner in frosted color aprons, sweating, shaking, crying and your kids hate you later in life and make you pay for their therapy don’t say I didn’t warm you.

Gamer Gifts

I’ve got quite a few gamers in my life. I’m a gamer myself. *REBEL YELL* Yeah, I’m a chick and I play Xbox. And no, I’m not a “girl gamer.” I’m just a gamer. That phrase pisses me off. It’s just another way for chicks who only play the video games their boyfriends play to take cute pictures of themselves looking like Lara Croft and get some attention.

Lara Croft is a p*&sy.  I could kick her ass. And I’d do it in sweat pants instead of short shorts. Cause that’s how I roll.

Gamers are a bitch to buy for because normally all they want is video games. Video game components. T-shirts. That gets boring, for both you and them, and leads you to a pretty limited list. So I’ve been opting to MAKE my gamer loved ones gifts. This way you can get super creative.

I personally love Bioshock. A whole lot. So a few years ago I made myself BioShock coasters, and thus the gaming gifts were born. This is only one of many of this type of gift I’ve made. And before you have visions of money dancing in your head, you can’t sell these. It’s infringement. So don’t even try. Not to mention no one will pay you what they are worth either. That’s the cruel hard truth of the hand-made world.

This gift is fairly simple, gives you a little bit of an artistic outlet, isn’t terribly expensive and is pretty gratifying, actually.

First off, figure out what game theme you wanna work with. Look up pictures in guides, the internet, whatever. You’ll need to print the pictures off either by high quality Xerox or your own printer. Now, that being said, if you own an inkjet printer you may want to seriously consider going to a Kinko’s or something to have them print it off for you because otherwise it will EAT your ink that you wouldn’t believe and probably NOT give you the quality you want.

Use REGULAR paper, no photo stock. Photostock is too thick for this project. Regular old paper works perfect.  Here’s what you’ll need:

4 tiles (or as many as you want in the set). I use the standard 4×4 or 6×6 tiles for coasters. Regular bathroom tiles. You can use old or used ones, new ones, whatever you want and the color generally doesn’t matter cause you aren’t gonna see the color anyway.

4 pictures from whatever game you want. I suppose you could use all the same picture, or mix up games, that’s entirely up to you. You can put a picture of your dog on it, it doesn’t really matter.

Spray paint: Just general spray paint. If your tiles are a wildly different color than the background you want OR has a pattern, I’d seriously suggest you buy white spray paint to sort of “prime it” first. Otherwise, buy the colors you want for the background of your tile. Keep in mind that if you want the picture to be the sort of “centerpiece” of the coaster, then it’ll take up most of your tile, so the only colors peaking out will be around the sides of the picture. I.e. you can’t get too intricate with your pattern.

Spray Adhesive. Krylon or Elmers make good ones.

Glaze. You can use spray or brush on glaze. Up to you. If you use a brush on glaze, you’ll need a brush or sponge. Duh.

Felt sheets. You can use the stick back kind of use the regular kind. You’ll need enough to cover the backs of your tiles. If you use the non-stick back kind then you’ll need:

Glue gun

Scissors

Embellishments like stickers or numbers/letters/whatever (totally optional)

A couple of paint liner trays. Like the kind you use to line your paint roller tray when you are painting a room. They are flimsy plastic. (optional but extremely useful)

All the safety equipment like glasses gloves mask blah blah blah

Once you decide on the pictures you want, you’ll have to decide on the size. If you have a 4×4 tile, obviously the picture needs to be smaller than that, say 3×3 or better yet 2.5 x 2.5 to give it a good tile border. This is assuming that the pictures are perfectly square. If not, try playing with sizes in a photo editing program and printing out some dummy pictures to get a good idea of the size. They don’t even have to be the actual pictures, just squares cut out to that size so you can hold them up to the tile and see if you like it. Play with the placement a little too. If you’ve got some stickers or embellishments you want on there, you’ll probably have to play with the placement a little bit if not the size.

Once that’s done and you’ve decided on your pictures, your size, etc now you get to print them out either on your home printer or at Kinkos. I chose Gears of War (GEARS OF WAR!!!! YEAAAAAAAHHHHH!!!!!!! BROTHERS TO THE END!!!!!!!!!!! Sorry, I’m a fan…)

Cut them out VERY carefully and try to get straight edges. Paper cutters work awesome for this.

Now put those aside. You may want to put them between a set of heavy books for the time being to flatten them out because regular paper tends to curl when there’s a lot of ink on it. Make sure they are dry before you do this. Duh. You are gonna leave those alone for now.

If you want to avoid accidentally scratching the paint off the sides of your tiles when you are done, you might want to trace the tiles onto your felt with a Sharpee now. They’ll act as your backing when you are finished.

Make sure you are in a well ventilated area cause you are gonna be using spray paint. And you don’t wanna get high. Or maybe you do, but seriously that’s REALLY bad for you. Don’t do that.

Place your paint trays (or newspaper if you don’t have paint trays) on your work surface and place your tiles well spaced apart on these trays. This is why I suggested you get a couple because I can only ever fit two per tray on the flat surface (paint trays kind of slant down remember?)

If your tiles are a bold color or have a pattern, you are going to “prime” them with white paint. If not then you are going to use your base color first. My finished coasters were going to be Red with Black accents. My tiles were black. Sounds like I could have just gotten away without priming but not true. In order for me to get a nice rich red color, I needed a white surface to work with.

I keep my paint in the garage and although I did this project in my garage, I had to bring the cans inside to let them get to room temperature. I live in Chicago. It gets cold in my garage. Spray paint + cold= thick nasty spray paint that doesn’t cover neatly.

My spray paint warming up

Now shake the can. Before you start spraying it’s IMPERATIVE you know a couple things:

#1 Don’t hold the can too close to your project. You want to be AT LEAST a foot away, more is a bit better. If you spray too close, you end up with super thick spray paint that either remains tacky, peels, is lumpy, or all three. None of these are good for a coaster.

#2 You need thin layers. Kind of goes with the one above. You want even, thin layers. You can always do another coat.

#3 Work in a back and forth motion. In other words, starts spraying a few inches to the left of the tile and work your way right in a straight line across. Then work right to left in the same fashion a little lower on the tile, so you are covering the tile nice and evenly in back and forth strokes.

#4 The edges of the tile can be annoying to get at. This is where that liner tray is so handy. Make sure once you’re done doing the main face of the tile, you turn the paint tray and get the edges. Remember, lightly spray at a distance, one good right to left swipe should do it for each side. You don’t want to end up with globs of paint on the top of the tiles, so make sure you kind of aim the can downward when you are doing the sides.

#5 Sometimes one coat will cover completely, other times it won’t. It depends on your paint, your tile, your technique. You can ALWAYS do another coat!

Ok, now. Ready. Set. Spray.

Primed Tile

Repeat that process for all of your tiles. Now you wait. I would suggest waiting at least 3-4 hours before considering another coat. I know. But patience patience!

Once the tiles are dry from the first coat, you can do your main color if you used primer OR you can do your accent color if you didn’t need primer. If you are doing your accent color, make sure you are gently depressing the spray nozzle AND holding it really far away to give yourself an “accent” coat. Otherwise you’ll just completely repaint your tile. When doing accent colors with spray paint the name of the game is distance. You want a light sprinkling, not a full on coat. Too many colors and too much paint will make it peel, so keep it simple.

Once your accent color is done (if you want one) let that one dry even longer. I’d suggest overnight. The next step is going to be adhering the picture to your tile, so you want it totally dry.

Once it’s dry, you are going to take your pictures and spray the back of them VERY lightly with the spray adhesive. REMEMBER: DISTANCE AND PRESSURE! They don’t need much glue! DO NOT coat the thing because if you do, the paper will get wet. If it gets wet, it looks horrible because it doesn’t dry properly (it’s glue for the love of god).

Once you do that, give your tile a gently spray with the adhesive. Now put the picture ON the tile and position it (kind of quickly but gently) where you want it. Make sure the paper is completely flat, as flat as you can possibly get it. You don’t want the edges curling up. Use the palm of your hand or your finger tips to flatten it out as you place it on there.

Now do that for all of your tiles and leave them sit again. Let them dry at least 4 hours.

I know. Patience!

Provided your final coat of paint was dry when you glued on your picture, and you let the glue dry at least 4 hours, you are probably ready to use a spray glaze. If you’ve opted to use a brush glaze, wait overnight. You don’t want the paint being ever so slightly tacky and coming off on your paint brush. Cause you won’t be able to fix it.

If you are using spray glaze, again DISTANCE AND PRESSURE! If you use TOO much glaze at one time, it’ll stain your pictures. Use a little bit, let it dry about 30-45 minutes, come back and see if you like it. If you want more, then you can add more again using DISTANCE AND LIGHT PRESSURE! Do this until you are satisfied.

If you are using brush glaze, remember to use a soft brush or sponge and glaze evenly and quickly. Brush glaze tends to want to leave brush strokes and gets tacky SUPER fast, so you gotta work quick and even. I only recommend brush glaze for those of you who have worked with it before. It’ll give you a kind of “lacquered” look to the tiles but it also is much more of a pain in the ass than a standard spray glaze coating.

At this point, you are nearly done. I know. Patience. Here are mine done and glazed:

Gears of War Coasters

Now you’ve got to do something about the back. Because if you leave them bear on the back they will scratch up your table or the table of whoever you give them to. Kind of defeats the purpose. This is where the felt comes in.

Trace the tiles onto your felt with a Sharpee. Mind the sides because the paint probably isn’t completely hard yet and you can scratch it pretty easy. I like to trace my tiles BEFORE I paint them to avoid this.

Trace The Tile Onto The Felt


If you didn’t get the stick kind (and I didn’t) it’s a pain in the ass. But it’s simple. Just cut out the felt and glue it to the back. Make sure the middle is glued and the very edges. It works best if you kind of work in a line from the top of the tile to the bottom, that way you can cover it pretty even a little at a time. If you try to just glue the whole thing at once, the glue dries super fast and the felt doesn’t stick. Then you are all pissed off trying to get the dried glue off the back and doing it again.

If you have leftover felt hanging off the sides, don’t panic, there’s a way to cheat. Just trim off the excess with scissors after you’ve glued. Again, mind the sides so you don’t scratch them.

Glue a little at a time

And you’re done!  An awesome set of gaming coasters for the gamer in your life. Sit back, relax, get the rest of your cursing out and perhaps chuck the extra tile across the room. You aren’t Martha Stewart so you can do that. And after all that, if the recipient doesn’t like them, threaten to put them where the sun don’t shine. Bet you’ll get a nice big thank you and a warm smile then. 🙂

Stupid Chocolate Covered Pretzels

Yet another thing I cannot eat. Chocolate covered pretzels. They satisfy the salty and the sweet and they are probably one of the worst things for you ever. On top of the deep fried twinkie. Pure sugar wrapped around pure carb. I can feel my body breaking down thinking about it.

They make great gifts though. At least great gifts for those people who refuse to listen to you (and a bunch of experts, doctors, history, primal biology, etc) that sugar is the enemy and fat isn’t gonna hurt ya. But I digress…

I initially wanted to make these as a gift to send to my friends and family who don’t live in the area. Duh. They’re gonna go stale and they will probably break. Course, my dumb ass didn’t actually THINK of this until half way through making them. Yep. Herp Derp. I think I gotta case of the Christmas wanna-makes. You know, around the holidays when you just get sudden urges to do super crafty things. Or, I get those urges anyway. I get them all year round though. I NEED to MAKE things.

If you don’t know how to make chocolate covered pretzels, it’s completely utterly ridiculously easy. I could have taken the long route. I could have tempered my own chocolate, etc. I’ve done that before. It’s hard. It’s annoying. It’s REALLY tasty, much MUCH tastier than the stupid melt wafers you buy at the store however it requires much more knowledge and time. Crafting chocolate is actually half art, half science. But of course in the US you can buy any supposed “chocolate crafting” supplies at any craft store. Don’t fool yourself. That’s not real chocolate. Real tempered chocolate doesn’t melt when you pick it up. Real chocolate doesn’t have a waxy coating. Real chocolate doesn’t taste just like chocolate flavored sugar. If that’s not enough evidence for you, then go to your local confectionery and eat a filled bon bon. Then try to make one at home with the readily available chocolate wafer and filling nonsense at the store. They won’t even taste remotely like the same food.

But since I have no nibs, no tempering equipment and no time, it’ll have to do. One day I WILL have the table top chocolate tempering machine, oh yes. Ok, it takes away from the romance of REAL chocolate crafting but too bad. It’s a cool gadget.

As far as these chocolate pretzels…..It’s the thought that counts damnit! And honestly, most of my friends and family (save one or two) aren’t foodies. I’ll take them to a restaurant that serves the most delicious pate, or an organic farm with the freshest raw milk and they are looking for the next cheeseburger fix. They are typical Americans: If it’s carb loaded or sweet, they’ll love it. I used to try to convert them. Now I just bank on it.

When I went to go get the chocolate wafers, I noticed they have “pretzel” molds. You can pour the chocolate into little molds so it’s a shape or a design on top of the pretzel. That’s not really my thing, but hey, if you like it go for it.

You’ll need:

Chocolate wafers—I bought red. I thought it would be Christmasy. Instead it turned out looking like dripping blood. Even cooler.

Pretzel Rods

A coffee cup. The taller the better. Make sure it’s microwavable.

A bunch of other shorter coffee cups.

A spoon.

A microwave.

This is a good kids craft cause it’s so easy. So first:

Creepy Franken-Chocolate

Fill the cup with wafers. Not completely but maybe 1/2 to 3/4 of the way. Microwave on DEFROST for about 30 seconds. Mind you, you should NOT microwave on high, or for long periods because heating the chocolate too much too fast will ruin it’s consistency. You’ll be stuck with a gross mess.

Take it out of the microwave and stir. They probably aren’t really melted at this point, but they are getting soft.

Put them back for another 30 seconds. Stir again. Here is where you will probably notice the creepiness of these chocolate-like-wafer-products. They kind of retain their shape even after they melt. It’s not until you STIR them that they kind of go liquidy. Weird. Frankenfood.

If at this point you can stir and get it nice and smooth, don’t worry about how hot it is. The nature of this type of chocolate is that you don’t actually want it very hot. You can zap it for 5 or 10 seconds if it hardens up on you. Just don’t overdo it.

Slow Yo Roll

Once you’ve got your chocolate nice and silky, you roll your pretzel in it. Just roll it, don’t dip it. Rolling it kind of creates a nice effect, dipping it will give you funky ends.

I tend to like the chocolate a little on the cooler side, that way you can get MORE chocolate on the stick without having to wait for it to harden and doing another dip. I’m impatient. We know this.

Drippy Blood Like Sticks...So Much For Christmas Red

Now to let them harden up. This is where the extra coffee cups come in. Just put them in the coffee cup pointing outwards. You can put several in the cup just to to make sure they aren’t touching each other, and let them harden.

And VIOLA! Instant cute little tasty gifts. Keep in mind they don’t last forever so make these literally at the last minute. Unlike me. And don’t taunt diabetics with them because we will hate you.

Measure this

I know so many people that absolutely adore cooking and home shows. I don’t. They annoy me.

First, cooking shows always make me hungry. Seems like I’m always watching them when there’s nothing to eat in the house.

Second, they are totally unrealistic most of the time. Who’s got time to spend like 4 hours on dinner more than two or three times a year? And even then it best have a turkey or a ham or people are gonna be pissed!

Organization and home and garden shows that assume you have a million dollar budget and endless time. I think the people that write these shows forget most of us don’t consider a 500 budget for a new “gift wrapping station” to be frugal.

I used to be addicted to these shows. I really did. Which says something because I don’t watch TV. Like ever.

Years ago I watched everything from HGTV to Martha Stewart. Just for ideas, I suppose. But all I ever felt was guilty that my house didn’t look like that or my little half hearted projects didn’t come out as pretty. You never see Marta Stewart chuck her little paper crafting BS across the room and start cursing God.

I remember watching one of her shows where she made “real” Polish food. I’m half Polish. I grew up in a Polish household and my grandparents were from Poland. I was glued to the TV. I watched her mother, who was supposedly Polish, come on the show and cook these perfect looking fancy shmancy cookies.

They weren’t Polish.

At least. No kind of Polish food I’d ever seen. REAL Polish food to me is full of fat and sausage and grease and the sweet stuff is fried and full of powdered sugar and apricot preserves and prunes. Not wimpy little freakin perfect cookies. I was not impressed.

Still, perhaps just to torture myself, I kept watching the show. And then I remember the day it stopped.

It was an episode where she was in her laundry room. Have you seen this thing? It’s bigger than my kitchen! It has cabinets, and a folding table, and a sewing station. Really? Cool, yes. I’d love a room like that. But really unrealistic for 99% of us.

I started off on a bad foot. F%^k martha and her perfect laundry room.

She started measuring a sweater. I couldn’t figure out why but thought maybe she’s making alterations to it or something. She wrote all the measurements down. Ok.

The she carefully washed it. And carefully dried it in some special manner (she was starting to lose me at this point). And then it happened. She started measuring again. The shoulders, the length, the distance between the armpit and the cuff…I realized with great horror what she was doing…

She measured the sweater before she really delicately washed it and then measured it AFTER so she could gently stretch it back to it’s original size (cause we can’t have it 1/4″ off on one arm, oh no) while still slightly damp.

You gotta be f*)*ing kidding me…

Who the hell has the time for that kind of thing? I don’t know about you but I’m certainly not going to be measuring every sweater I wash in my little crappy, crowded, dirty, cluttered laundry room every time I do a load of laundry. The UNrealism of this ENRAGED me. So I shut her off. Forever. It’s been many a year and I’ve still no desire to watch it ever again.

It’s not the totally ridiculous nature of doing things like that that ultimately made me shut it off. It was a realization: Not unlike fashion magazines and “rich bitch” reality TV shows, programs like that serve one purpose: To make the rest of the population feel bad about their situation and aspire to be more like the people they promote. Why would they want that? Well, probably because you’ll spend more money if you aren’t happy with yourself. You’ll run out to get the latest Martha Stewart collection sweater stretcher at JCPenny and be a good little consumer.

Screw that. My house gets dirty. When I wash as a sweater, I throw it in on delicate and pull it out and hang it on the little drying rack I have. Or if I’m really lazy and don’t have any other laundry to do (which happens like once…ever) I’ll throw it in the dryer on super low dry and keep starting the cycle over and and over again.

I haven’t read Martha Stewart’s magazine in many years, but last time I did, they used to have a calender in the front telling you what to “schedule” for that month. With really important things too like “service the vacuum cleaner” and “service your lawn mower.” Really?!? Who really gives their lawn mowers regular check ups? I mean really? I know “they” (the proverbial “expert HGTV television media Bob Villa” they) tell you to do, but WHO REALLY DOES? You know when my lawn mower gets serviced? When it ain’t workin’ right. Otherwise it’s cutting grass or resting in the garage, not getting a spa treatment and a facial.

So if you are addicted to these types of shows, I challenge you to stop watching them. Live in your OWN world for awhile. I’m NOT the best decorator ok (nothing in my house matches, I can never decide WHAT my style is that week) but I did notice once I stopped with those shows, I became much more accepting of my HOME! HOME! Emphasis on that word. HOME! Not magazine spread. I kind of started liking the fact that I had scattered memories around my house that would never make it on TV. That, even though my furniture didn’t match, everyone that came to my house for a cup of coffee commented on how “warm” a feeling the house had. And when my niece and nephews one year told me that the scent and feel of my home was their very favorite, enough that when a letter from Santa came to their mailbox smelling like “Auntie Jess’s House” (damnit, I should have thought of that but I didn’t!) their mother told them that was because Santa knew that Auntie Jess’s house was one of their favorite smells, and they bought it, it sealed the deal for me. Now THAT. That right there was proof enough that I’m doing something right. That something right had nothing to do with designer jar candles and Ralph Lauren paint.

Don’t get me wrong, this house needs work but it’s mostly for practical purposes. Sure, I’ve got pipe dreams like the rest of us on the how I’d love the house decorated but they are MY pipe dreams at least. Not stolen from HGTV. I’m certainly NOT saying don’t find inspiration, but there is a fine line between inspiring yourself and just torturing yourself or being spoon fed.

I started to notice the further I got from the home and garden TV shows, the MORE creative I got. If I wanted to do something, I researched it myself. I started getting more comfortable putting spins on things. My owns spins. Eventually, those little “spins” became whole new ideas. Some were variations on age old things, others were simply no variations at all but instead a great appreciation with how things were once done and trying to capture that lost art. Some I realized I couldn’t do at all. Ever. (I can’t sew. I really can’t sew. I’d LOVE to, but I’m sewing challenged. I don’t get it. 3 classes and a private lesson later I still have no idea.)

There are hard and fast rules to anything. You don’t wanna mess with certain things. Primer comes before paint. The chicken should be cooked at 350. Strawberry jam needs processed in a boiling water bath for 15 minutes,  no less. But other things are pretty obvious. If there’s a different way to do something, try it. Do what makes it easier, or do what improves upon it and don’t be afraid it’s not gonna look magazine perfect. Get pissed at it. Then pick it up and try again. Or realize you simply don’t like it and no one can make you. And don’t feel bad about that.

Learn the difference between inspiration and instruction. Somethings are meant to be literally taken and done, others are just ideas. When it’s literal, it’s usually really obvious.

I’m not demanding you shut off the TV, you can do what you like, but try to take it at face value. It’s entertainment. Nothing more. You live in the real world, with a REAL budget, real problems, real time constraints and real ideas. Oh no! You can’t make duck with cranberry sauce and lightly sauteed scallions for dinner! SFW. You’re family will eat your cheesy chicken and broccoli and like it better. Probably more. Oh no! You’re carpet doesn’t match your couch! Well, maybe if the dog would stop tracking in mud it would, but who’s going to buy a new couch and send $300 having their carpet shampooed when bills need paid? Take some Spot Shot and do your best with it when you get a free moment. If that doesn’t work, pass it off as Fido’s art work. You’ve got other things to worry about I’m sure. No one is gonna judge you on your stained carpet. And if they do, tell them to get the hell out of your house.

And I highly doubt, regardless of what TV tells you, that you have time to stretch a damn sweater.